 It’s been six years of casual blogging on Kate’s Plate (a name I’m still not sure that I like, but oh well)! My little corner of the internet has often been neglected, but I’m glad it’s here, and that you’re here, too.
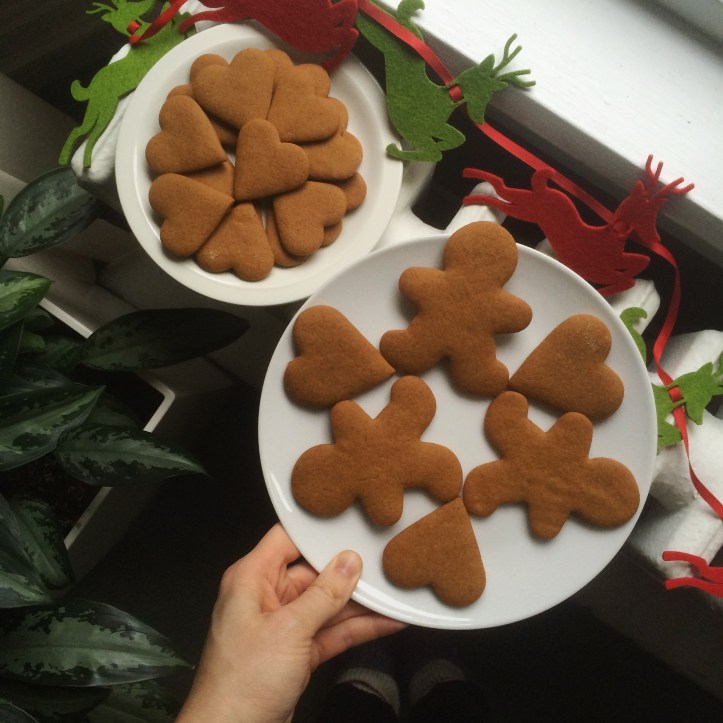
The first recipe I posted was my mum’s gingerbread. (I refer to it as my mum’s since I will forever associate it with her, but should probably give the cred to Martha Stewart.)
I can’t remember why, but I split that first food post into two parts: one with a bunch of exclamation marks (gingerbread! “festive, and oh-so-delicious!”) and awkwardly lit photos, and a separate post with the recipe.


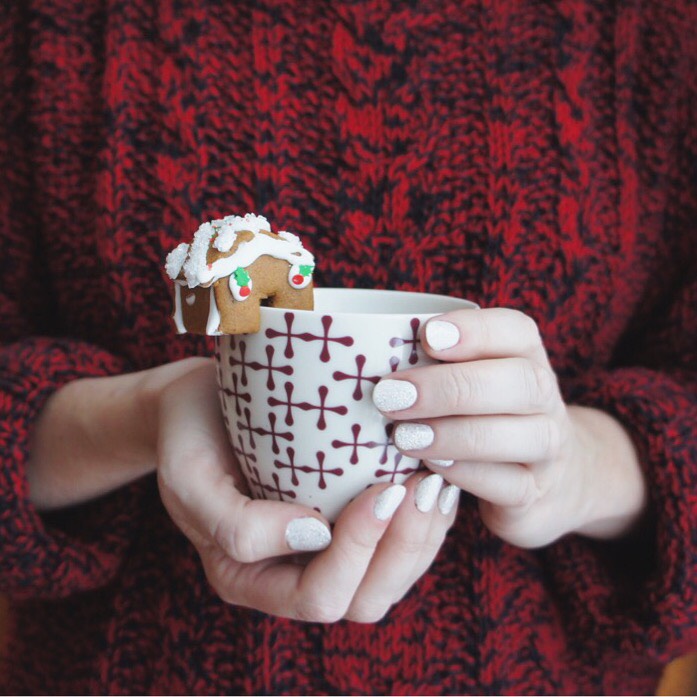
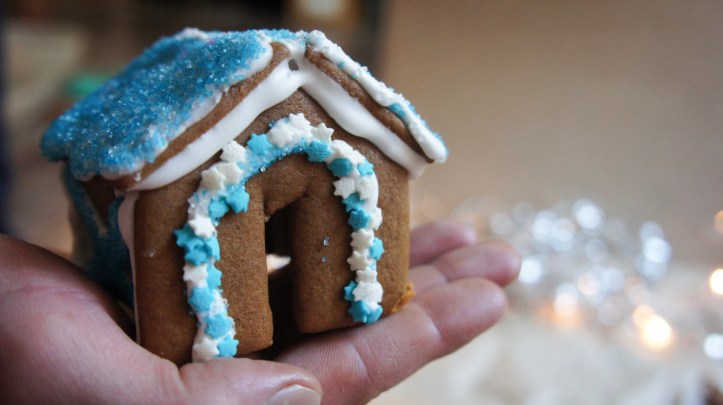
2017 was a bit of a post-drought over here, so it seems silly to mark any kind of blogiversary, but last year I had my mind set on making mini gingerbread houses to be mug-toppers (“festive, and oh-so-delicious!) to celebrate five years of this hobby. I made them, but the template I went with was way too large, and I didn’t even check the size of the template in relation to the mug (rookie move – you call yourself a blogger?!). So, they were just miniature houses that comically perched on some of the largest mugs I had around.
This year, I was determined to get it right. The structural integrity of these little houses was certainly questionable, as was the ratio of icing to cookie, but! they were tiny and twee. I was happy.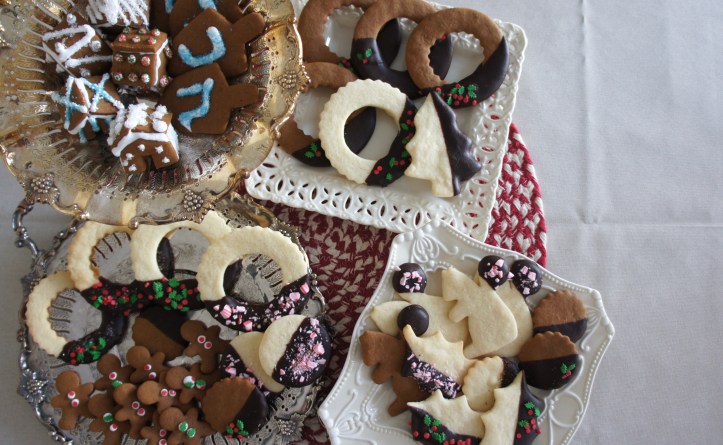
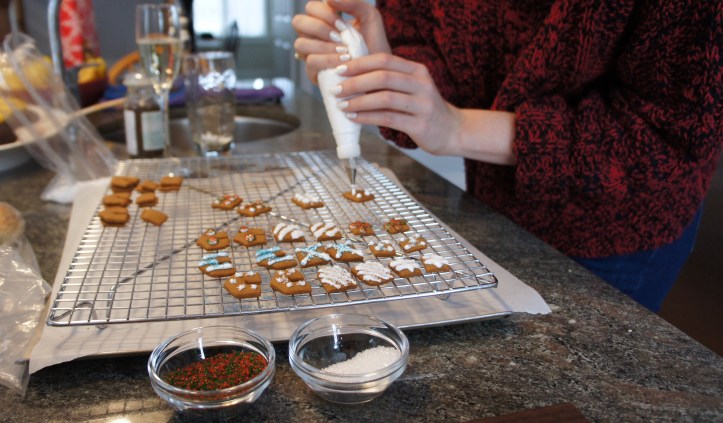
I’d like to think that the quality of the photos around here has changed – happily, our holiday traditions haven’t (gingerbread galore!). So, all in one place, here are a bunch of gingerbread photos and the recipe (really, this do-over is so that the next time someone asks for the recipe I’m less embarrassed when I send a link to my blog. Heh.).
Here’s to years five and six of this little blah-blah-blahg. Thank you so much for popping by. It’s a hoot to share with you the things that bring me joy and/or enthuse me enough to ramble on about it on the internet. I hope you’re mildly entertained and/or have time to try a recipe, whether it’s this gingerbread (clearly an obsession of mine) or something from the archives with dimly lit photos.
And, thank you to my mother, who puts up with kitchen messes every time I visit, and is probably the first to read anything that’s posted here. Call me when you find a typo. xo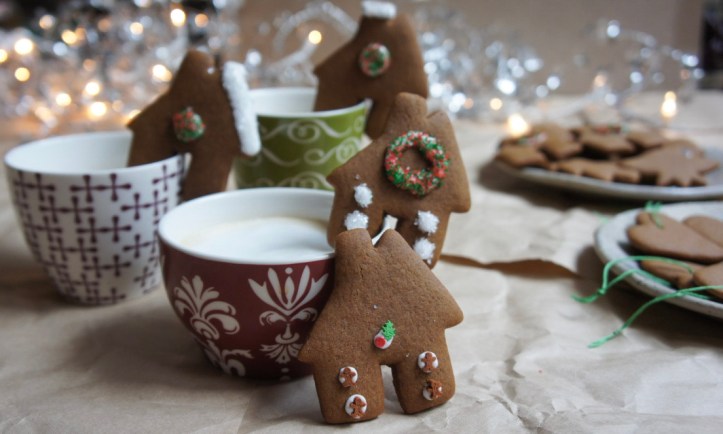
Gingerbread Cookies –adapted by mum from the Martha Stewart, Holiday Cookies Special Issue, December 2001
Makes about 3-4 dozen cookies (depending on the cookie cutter you choose!)
|
5½ – 6 cups all-purpose flour, plus more for your work surface |
1 tsp baking soda |
|
½ tsp baking powder |
½ pound (2 sticks) unsalted butter |
|
1 cup packed dark brown sugar |
4 heaping tsp ground ginger |
|
4 heaping tsp ground cinnamon |
1 ½ tsp ground cloves |
|
1 ½ tsp finely ground pepper |
1 ½ tsp salt |
|
2 large eggs |
1 cup molasses |
In large bowl, sift together flour, baking soda and baking powder. Set aside.
- With an electric mixer, use the paddle attachment to cream butter and sugar on medium speed until fluffy. Mix in spices and salt, then eggs and molasses. On low speed, add flour mixture into the mix.
- Divide the dough in half and shape into flattened disks; wrap in plastic (I find it easiest to put the dough on a layer of plastic wrap and press it down into a disk, than wrap it with the plastic wrap and use a rolling pin to roll it into a more even disk). Let chill in the refrigerator for at least 1 hour.
- Preheat oven to 350°. You will need a few baking sheets lined with parchment paper, an offset spatula, a rolling pin and, of course, cookie cutters. Remove dough from the fridge and let it stand at room temperature for a few minutes before rolling. Place a large piece of parchment paper on a clean counter surface and dust generously with flour to prevent the dough from sticking.
- Taking a quarter of the disk at a time, roll dough to about a ¼ inch thickness, stopping every once in a while to release the dough from the paper by running the spatula under the dough. Add more flour to keep it from sticking if necessary.
- Cut dough into desired shapes. Bake cookies for 8 to 10 minutes, or until crisp but not darkened, rotating halfway through. Let cookies cool on wire racks than decorate as you wish.Notes:
– Pop the tray of unbaked cut out cookies in the freezer for 10-15 minutes before baking; this will help the cookies retain their shape in the oven.
– If you’d like to use your cookies as ornaments, just make a hole with a clean nail (or something similar) at the top of the cookie before they go in the oven.
– This recipe doubles well, and freezes well in an airtight container for a couple months. At room temperature they will keep in an airtight container for several days (even when they’re “stale” these cookies still taste good).
– This is totally doable without a stand mixer, but will take a little muscle, is all.

In the spirit of disorganization that thrives here on Kate’s Plate: the blog’s “birthday” was actually in December…so yes, this is a belated post. And yes, I’m posting decidedly holiday-looking photos in January. This is what happens when anyone can put things online!
(If you’re stuck inside because of a winter storm, this might be a nice activity! Stay warm and safe out there, friends out East.)

I just wanted to say – I like the name of the blog! Also… now I want to eat gingerbread…
haha, thanks adam :)
…send me your addy and i can mail you some next xmas! hope you’re well!
Hi Katie! I’m updating an old post and I re-read your old comment you left on my recipe (https://asideofsweet.com/pavlovas-blood-orange-curd-recipe/). Not sure if you went through with the medical school process or not but I’m glad to see you’re keeping the blog up. Take care!
hi kelly! ah, wow – how things change. haha, i did not end up applying but things have worked out alright :)
thanks for the sweet note!